As some of you who know me of old I used to have my own miniature painting service which kept me housed and fed for a couple of years a while back. the long and short of it is that I was doing far too much work for other people and wasn't able to do anything at all for myself so I decided to ditch the business and pick my brushes up for myself again.
I don't like doing contracts for other people anymore so it is very much the exception rather than the rule BUT on occasion something takes my fancy or I'm driven by another need (such as a burning desire to start building up my scenery collections ) and I will agree to complete some work for somebody else...
Shaun over at S and S Models (www.sandsmodels.co.uk) made it known that they have just started a new line of 15mm contemporary buildings and I was suddenly swept away with imaginings of all the new painting techniques that I could try and the possible results... I agreed to paint up three of their new buildings for them and here, for your approval are the results.
Building 1: A Victorian Engine Shed
This is a brick built building that would be able to slot into any scenery dating from the mid Victorian era onwards. The design is pretty much what it says on the tin and with the exception of perhaps different coloured bricks being used or the whole building being made to look dirtier it could be argued that this was the most straightforwards and perhaps most accurate looking of the buildings to paint.
Here are the results:


The brickwork had a basecoat of Vallejo Panzer Aces Dark Rust. A drybrushed highlight of Games Workshops Vermin Brown with a second stage drybrushed highlight of Blazing Orange.
Once this was done individual bricks were picked out with Vallejo German Camo Black Brown and Vallejo Panzer Aces Light Rust.
A mortar wash was applied using Modelmates Weathering Wash Mud Brown. This particular product is not waterproof once cured which is actually a lot handier than you may think. Once totally dry kitchen roll is twisted over it in order lift patches of the wash off leaving an increasingly mottled appearance on the brickwork.
For the roof I used a basecoat of Vallejo German Grey with individual tiles picked out with German Grey mixed with black and others in Vallejo's Neutral Grey. The whole roof was then washed with the Modelmates Weathering Wash with the same process followed again.
et voila! The first finished building (waiting to based on something spangly!)
Building 2: A Contemporary Supermarket
On studying the building, and taking into account the normal type of flaws in the casting I made the decision that the best way to disguise the flaws and still give a tip top building of this type would be to knock it up as an Asian shop from Hanoi in the '50's, with these types of building displaying all sorts of decrepitude and weathering to their exteriors. Shaun however was keen that the model was done as a Western European shop and so I had a look around and found a German brand that I could mimic with a paintbrush and plunged ahead. On finishing it however I decided that something else was needed to 'spruce it up' a bit and on the back of that I decided to apply some heavy weathering. This is what I came up with:


Really simple painting techniques with this one, nothing really to write home about except perhaps mentioning that all of the weathering on the building is provided using AK Interactives Washes and Filters for rust, slime, dirt deposits and such like...
Building No 3: An old German mechanics garage
This was the one that I wanted to go to town on. Due to its metal panelled walling and the board and batten roofing all topped off with its plain wooden fronting this provided a lot of opportunity for heavy weathering which I was really keen to try ahead of my plunging into my Dropzone Commander dereliction scenery.
I was curious about trying the 'hairspray technique' and after a couple of attempts to nail what I was after (the first attempts on the wooden boarding being far from satisfactory) this is what I came up with:
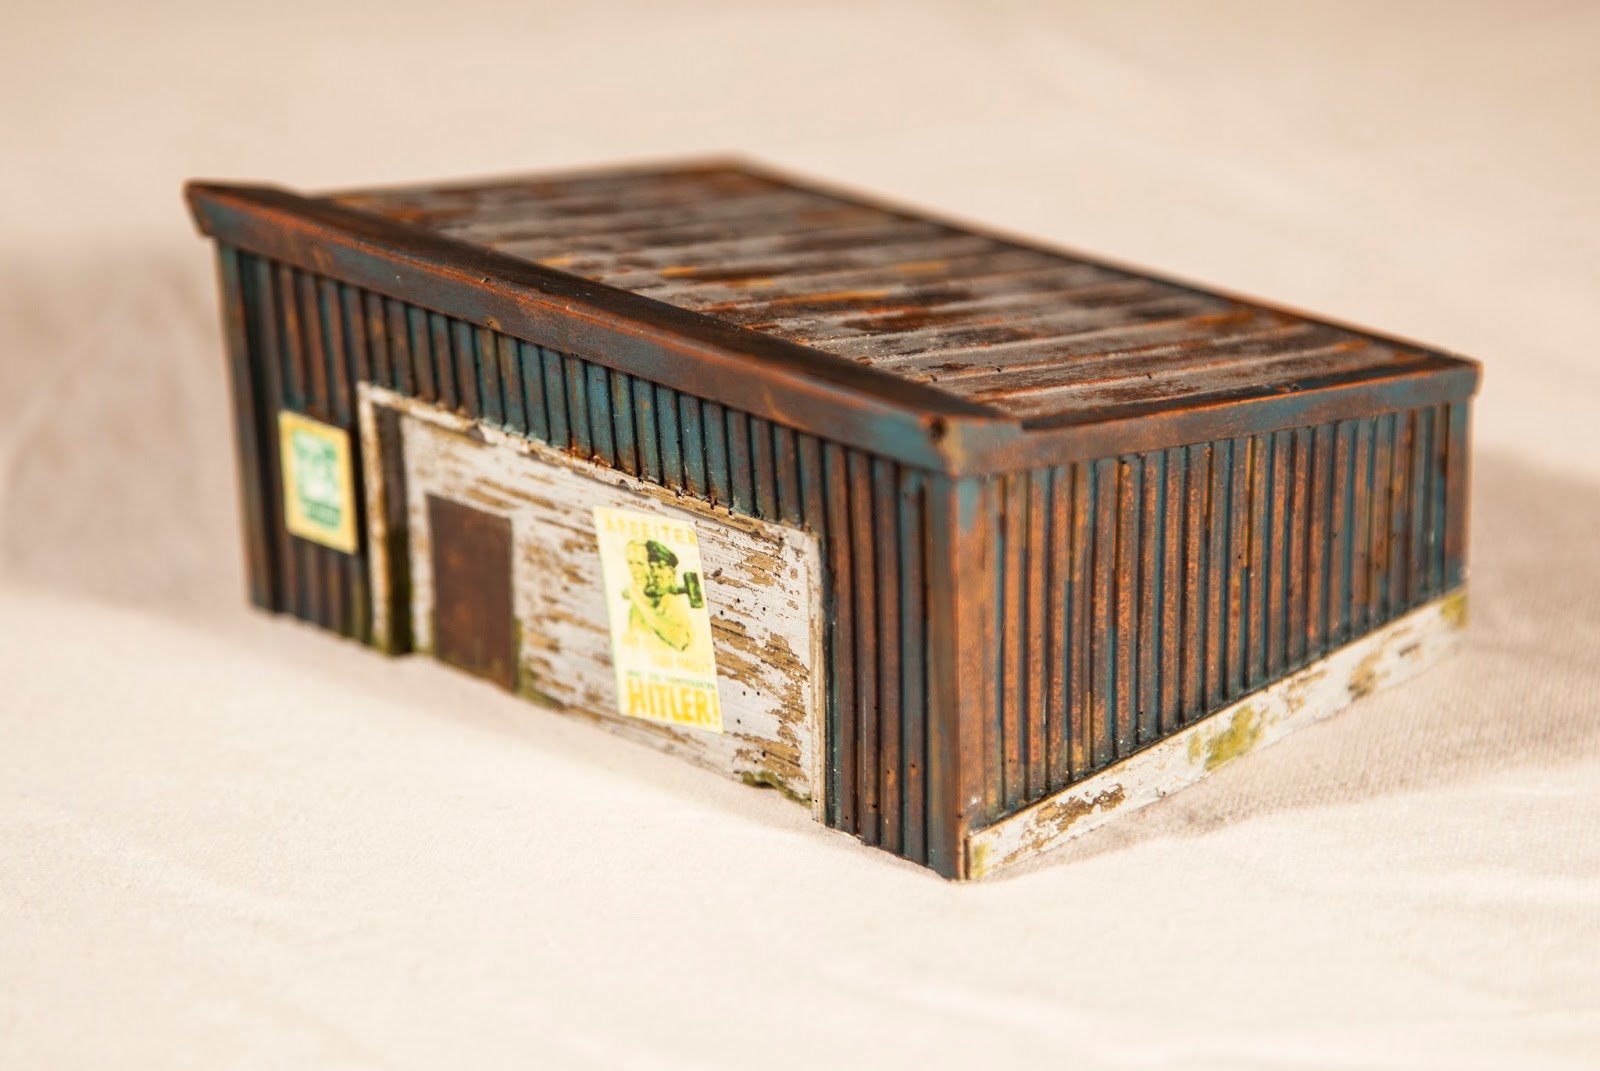


I was really REALLY pleased with the way that the wood came out and the long and short of it all is that you have to paint a base coat as if it were a top coat that you would be happy to show. Once done apply a coat of varnish (it doesn't matter whether it is gloss or matt at this stage). Once totally dry apply a layer of hairspray. I use medium hold and the amount of spray to apply depends on the amount of paint you want scraped back from the next coat.
Once the hair spray is dry airbrush your topcoat over the top of the hair spray. I would say use an airbrush because the paint layers are so thin and therefore easier to work with. I haven't tried it with brushed on paint but so long as the layers are thin it should be workable.
Leave the final paint layer to dry and then with a brush apply clean water to the area you want the top coat scraped back from and carry on massaging the water into the top coat until the paint starts to lift away... this is how I got the distressed wood look on the front, the rusty walls on the other three sides and the rusted galvanised roof on top.
Boom! Job done!
No comments:
Post a Comment